2.2.2.4. Unitaskers
I know, I know...unitaskers. Some unitaskers are worth making space for, though,
because of how well they perform their particular tasks.
Box grater. A simple box grater for grating
vegetables, cheese, and butter (for cutting into pastry dough) can save a lot of time.
Sure, you can use a food processor with a grating disk (fast but lots of cleanup) or a
paring knife to cube (tedious), but there are times when it’s just easiest to plop a box
grater on a plate or cutting board and grate away.
In a pan, sear
1–2 lbs / 0.5–1 kg cubed stewing beef (it should be a cheap cut for stewing; more
expensive cuts won’t have as much collagen, which will affect the texture). After browning
the outsides of the beef, transfer the meat to the bowl of the rice cooker. Using the
same pan, sauté one or two diced onions (red, yellow, white—doesn’t matter). After the
onions have started to caramelize, transfer them to the rice cooker. Toss in a can or
two of diced tomatoes (enough to cover the beef). Add seasonings—such as oregano,
thyme, or rosemary—and salt and pepper. You can add diced potatoes, canned beans, or
other starches as well. I sometimes throw in a tablespoon of ketchup and port to add
more flavors. Leave to slow cook for at least six hours. You can start the cooking in
the morning before work and arrive home to a quick and easy dinner of beef
stew. 
|
Pepper grinder. You want a 9″ Unicorn Magnum
Plus. Really, that’s the best pepper mill out there; never mind what it sounds
like.
Garlic press. If you like a good strong kick of
garlic in your food and don’t mind taking a shortcut, a garlic press makes it easy to
get a quick fix. By all means, if you’re the type who strongly believes in always doing
things the right way—a sharp knife, dicing it with precision, and reveling in the
texture and nuance—then skip the garlic press. But if you’re a garlic lover who, after a
long day at work, just wants to cook a quick five-minute meal, a garlic press will make
it easier to use your favorite ingredient. The trick is to get a garlic press with a
good handle and good “teeth,” so that you can pop in a clove
unpeeled and squirt out fresh garlicky goodness. Then, make sure
you pull out the just-pressed skin and wash the garlic press right
away. With these two tricks, you can add garlic to a dish with about five
seconds of work. Be advised that garlic squirted out of a garlic press will quickly
oxidize, so save pressing the garlic until the moment you’re ready to cook it.
Note:
Try this: cook a serving of pasta. Then, in a small sauté pan over medium heat,
add a tablespoon or so of olive oil. Once the oil is hot, use a garlic press to add
two or three cloves of garlic and cook until the garlic gives off a pleasant aroma.
(You can “squirt” the garlic from the garlic press straight into the pan.) Toss in the
cooked pasta to coat and serve. Top with Parmesan cheese and a few red pepper flakes
if desired.
Don’t be shy about using your hands!
After a good scrubbing with soap, they’re just as clean as a pair of tongs and
infinitely more dexterous. Tossing a salad? Putting veggies on a plate? Dropping
cookie dough onto a baking sheet? Use your hands. It’s faster, easier, and means one
less utensil to wash.
I was making crepes at a friend’s dinner party several years ago and one of the
other guests was an executive chef for a prominent Boston restaurant. We were in the
kitchen together chatting about our respective fields of software and cooking. He
stopped me as I went to flip the crepe with a spatula, showing me how to pull it back
and flip it using my hands instead. Flipping this way allows you to feel how much the
crepe is sticking to the pan and avoids the awkward angling-in of a spatula against
the sidewall of the frying pan. While I still usually use a spatula (my fingers aren’t
made of asbestos like a full-time cook’s!), the idea of getting in there with my
fingers has definitely made me more comfortable grabbing foods and moving them where
they need to be. Just don’t burn yourself, and remember to wash your hands, especially
when working with raw meats.
1-2-3 Crepes
Whisk or purée until entirely mixed, about 30 seconds:
1 cup (250g) milk (preferably whole
milk)
2 large (120g) eggs
⅓ cup (40g) flour (all-purpose)
Pinch of salt
Let rest for at least 30 minutes, preferably longer, so that the gluten in the
flour has a chance to thicken the batter. (Stash the batter in the fridge if you’re
going to leave it for more than half an hour.)
Making crepes is like riding a bicycle: it takes practice before it’s easy. Expect
to completely screw up the first few you make (training wheels!), and keep in mind
that while the batter is easy and the technique simple, the error tolerances are
actually pretty tight, so don’t get discouraged! Like riding a bicycle, it’s far
easier to go fast; going slow is hard.
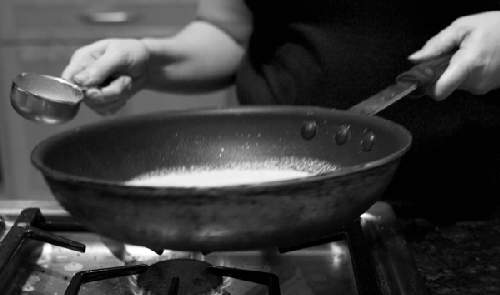
Start with a nonstick frying pan over medium-high heat, heating up the pan for
about 30 seconds, or until a drop of water sizzles when dropped into it. Once your pan
is at temperature, plan to work quickly: butter, wipe down, pour batter in while
swirling, flip, flip again, add fillings, plate, and repeat.
Because they’re fast and cheap, crepes are great for dinner parties or brunches, but
you should definitely practice beforehand.
Butter: Grab a cold stick of butter with the
wrapper partially pulled back, and using the wrapped part as a handle, spread a small
amount of butter around the pan.
Wipe down: Use a paper towel to thin out the
butter over the surface of the pan, wiping up almost all of it (and on repeats, any
crumbs left behind from the previous crepe). The pan should look almost dry; you want
a super-thin coating of butter, not noticeable streaks.
Pour: Pour in the batter while swirling the
pan: pour about ¼ cup / 60 ml of batter into a 10″ / 25 cm pan, adjusting as necessary
(you want enough batter just to coat the bottom evenly). While pouring in the batter
with one hand, use your other hand to hold the pan in the air and swirl it so that the
batter runs and spreads over the surface of the pan. If you can pour batter out of the
pan after swirling, you’re using too much.
If you’re short on batter, you can “spot pour” a bit in to fill in the gap. This
is also the point at which you should check the heat of the pan: it should be hot
enough that the batter develops a lace-like quality: little holes all over the crepe
as the steam tunnels up through the batter. If your crepes come out whitish, turn up
the heat.
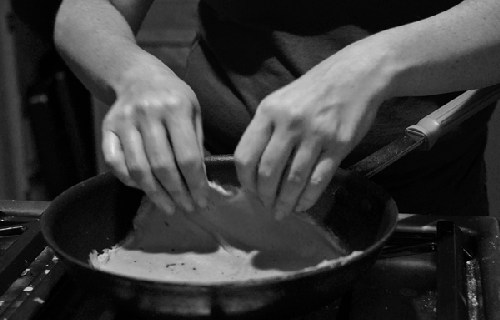
Flip: Wait until the crepe begins to brown.
Don’t poke, don’t prod; just let it cook. Once the crepe has begun to brown around the
edges, use a silicone spatula (one of those folding spatulas works well) to push down
the edge all around the circumference. This will release the edge of the crepe so that
it lifts off the pan. Carefully grab that little edge to flip the crepe with both
hands.
Flip again: Let the crepe cook on the second
side for half a minute or so, until it’s cooked. The first side should come out a
uniformly brown tone, so flip the crepe again before adding the fillings. This will
leave the better-looking side on the outside of the finished crepe.
Add fillings: Add whatever fillings you like.
You can heat and even cook the fillings by leaving the pan on the heat during this
step. Or, you can move the crepe to a plate and fill it off the heat if you’re using
something cold (e.g., lox, cream cheese, dill). Crepes are a great vehicle for almost
any filling, either savory or sweet. If a combination of ingredients works on pizza or
in a pie, it’ll probably work in a crepe. Try some of the following
combinations:
- Powdered sugar
- Lemon juice
- Jam
- Granulated sugar
- Grand Marnier (orange liqueur)
- Cheese
- Eggs
- Ham
- Dill
- Sausage
- Cheese
- Lox
- Onions
- Bananas
- Cream cheese
- Chocolate ganache or Nutella
Notes
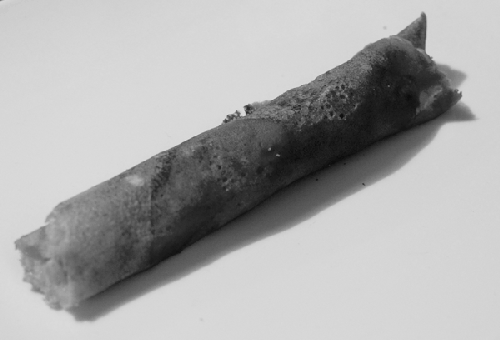
It might not look pretty, but a rolled-up crepe with a light sweet
filling is fantastic.
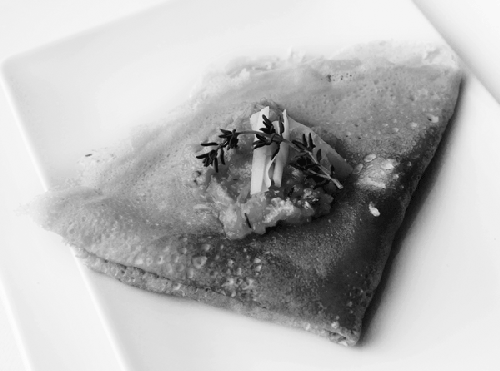
If you have a substantial amount of filling, it’s easier to fold the
crepe into quarters or into a square. I put a small amount of the filling on top
as well, as a reminder of what’s lurking inside.
When making a crepe with an egg, you can crack the raw egg directly
onto the crepe after it’s done cooking but while it’s still in the pan. Use the
back of a fork to break the yolk and scramble the egg, smoothing it over the
entire surface of the crepe. Drop some cheese on top wherever the egg is setting
too fast.