Make a sewing basket and gift tags to treat
your mum on 18 March, this Mother’s Day
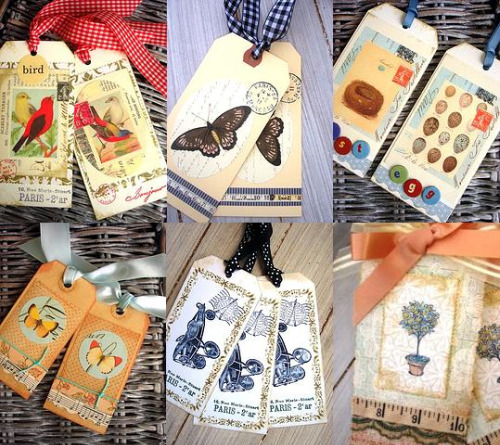
Decorative gift tags
A beautiful gift tag will add a special
touch to flowers and any other presents
Take the stiff card and cut into the shape
of an old-fashioned luggage label, which is basicafly a rectangle cut to a
point at one end. Cover one side with snippets of wallpaper, lace trim and
buttons, sticking everything on with PVA glue. Use the hole punch to make a
hole at the pointed end for the ribbon and thread through a little length to
secure the tag to your present.

A
beautiful gift tag will add a special touch to flowers and any other presents
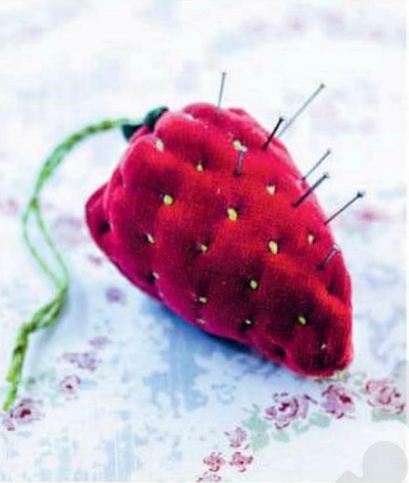
Strawberry pincushion
Almost too good to stick pins in, this
fabric fruit is practical as well as pretty
You will need
Red velvet or felted wool jumper, fabric
scissors, pins, hand-sewing needle, sewing threads, polyester stuffing, green
fabric, tapestry needle, thick green or yellow embroidery thread.
1. Use scraps of red velvet or wool from a felted jumper and cut out
two triangles a little bigger than the size you want the strawberry to be. Pin
them right sides together and backstitch around the two sides, taking a narrow
seam allowance and making a rounded point for the bottom of the strawberry.
2. Turn the cone right side out and fill with stuffing, packing firmly.
3. With a needle and red thread, sew a line of running (straight line)
stitch all the way around the top of the opening. Pull up the gathers tightly
and make a few stitches across them to close the top of the strawberry.

Almost
too good to stick pins in, this fabric fruit is practical as well as pretty
4. Cut out a jagged-edged circle from the green fabric to look like a
leafy stalk. With thick green thread, sew a loop in the centre of this so you
can hang the strawberry up. Sew the leaves in place over the gathers with
small stab stitches and matching green sewing thread.
5. With a tapestry needle and yellow thread, start at the in the bottom
and gradually work towards the top making tiny stitches to look like pips
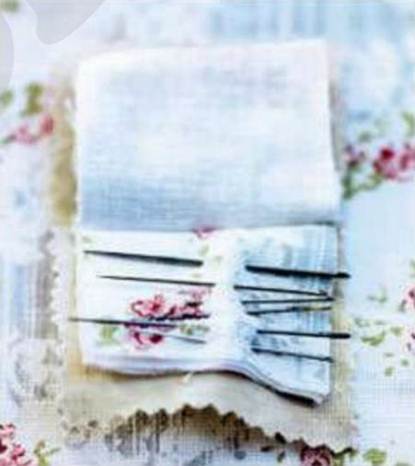
Little needlebook
A fabric book will keep your sewing needles
safe
You will need
Several pieces of fabric, fabric scissors,
pinking shears, pins, hand-sewing needle, sewing thread, iron, needles
1. Cut out three different- coloured fabric rectangles to fold in half
to make the book as large as you would like it to be.
2. Then, using pinking shears, cut a piece of fabric in a rectangle
slightly larger than the pages to make the cover.

A
fabric book will keep your sewing needles safe
3. Pin the smaller rectangles of fabric to the inside of the cover to
make the pages of the book. Use running (straight line) stitch and cotton
thread to sew them in place down the centre. Fold the book over along the
stitched spine and press it. Pop a few needles into the pages.
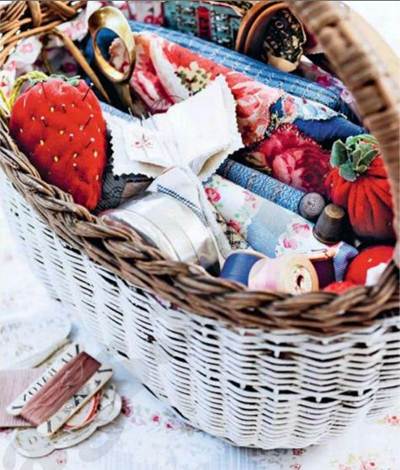
Sewing basket
Add a fabric liner to an it into a beautiful
place
You will need
Old wicker shopping basket, newspaper for
template, paper and fabric scissors, fabric, iron . hand-sewing needle or
sewing machine, sewing thread, long needle
4. Start with a whole sheet of newspaper. Scrunch it up, then flatten
it out so it creases more easily, then push it down into the corners of the
basket. Trim off all the edges sticking up above the sides of the basket. Use
this paper as the template to cut out the fabric for the lining, adding a
little extra all around the top for a hem.

Add
a fabric liner to an it into a beautiful place
5. Turn under the hem and iron. Sew all the way around, either by hand
or using a machine.
6. Place the hemmed circle in the basket and, using a long needle and
thick sewing thread, sew the lining into the basket all the way around with
running (straight line) stitch. You will need to look carefully to see where
the needle can fit between the strands of wicker. Sew just under the edge of
the basket, gathering the fabric up where necessary so it’s evenly pleated all
the way around.