Biologically based
leaveners—primarily yeast, but also bacteria for salt-rising breads—are surely the oldest
method for generating air in foods. Presumably, a prehistoric baker first discovered that a
bowl of flour and water left out will begin to ferment as yeast from the surrounding
environment settles in it.1. Yeast
Yeast is a single-celled fungus that enzymatically breaks down sugar and other sources
of carbon to release carbon dioxide, ethanol, and other compounds, giving drinks their
carbonation, spirits their alcohol, and beer and bread their distinctive flavors. Even
making chocolate involves yeast—the cocoa beans are fermented, which generates the
precursors to the chocolate flavor.
Different strains of yeast create different flavors. Over the years we’ve
“domesticated” certain strains by selective breeding—from common baker’s yeast for bread
and wine (Saccharomyces cerevisiae) to those for beer (usually
S. carlsbergensis, a.k.a. S.
pastorianus).
Since there’s plenty of yeast literally floating around, you don’t have to directly
spike your brew or seed your bread with yeast. New strains of yeast usually start out as
wild hitchhikers, and sometimes they taste great. Traditionally winemakers relied on
ambient yeasts present in their cellars or even on the grapes themselves (this is the
origin of the traditional European le goût de terroir approach to
winemaking).
However, the “Russian roulette yeast method” might not end so well when you’re working
in your kitchen: there’s a decent chance you’ll end up with a nasty and foul strain of
yeast that’ll generate unpleasant-tasting sulfur and phenol compounds. This is why you
should add a “starter” strain: providing a large quantity of a particular strain ensures
that it will out-race any other yeasts that might be present in the environment.
Note:
There’s nothing magical about the strains of yeast we use other than someone taking
notice of their flavor and thinking, “Hey, this one tastes pretty good, I think I’ll
hang on to it!”
Like any living critter, yeast prefers to live in a particular temperature zone, with
different strains preferring different temperatures. The yeast commonly used in baking
breads—aptly named baker’s yeast—does best at room temperature
(55–75°F / 13–24°C). In brewing beer, ales and stouts are made with a yeast that is
similar to baker’s yeast; it also thrives at room
temperature. Lagers and steam beer use a bottom-fermenting yeast that prefers a cooler
environment around 32–55° F / 0–13°C. Keep in mind the temperature range that the yeast
you’re using likes, and remember: too hot, and it’ll die.
1.1. Yeast in beverages
Wine, beer, and traditional sodas all depend on yeast to ferment sugar into alcohol
and generate carbonation. Consider the following equation:
Fermentation = Water + Carbon (usually Sugar) + Yeast + Optional Flavorings
Selecting the appropriate strain of yeast and controlling the breeding
environment—providing food, storing at proper temperatures—allows for the creation of
our everyday drinks:
Wine = Grape Juice[Water + Sugar] + Yeast
Beer = Water + Barley[Sugar] + Yeast + Hops[Flavoring]
Mead = Water + Honey[Sugar] + Yeast
Soda = Water + Sugar + Yeast + Flavorings
Some of these are easier processes to control than others. Wine, for example, is
relatively straightforward, with few variables: vary the sugar level to control the
amount of yeast activity and choose the grapes and strain of yeast per your desired type
of wine (trace elements in the grapes themselves are usually responsible for the flavor
and aromas in wine). Beer has more variables to play with: in addition to sugar levels,
proteins and saccharides have to be controlled to correctly balance viscosity and head,
and the bitterness of the hops has to be managed.
Note:
Hops—the flowers of a herbaceous perennial—are a recent addition to beer making.
The earliest beers were flatter and sweeter, and would quickly spoil. Around the
eighth century, brewers discovered adding hops extended storage times by acting as a
preservative.
Making your own homebrew doesn’t have
to be a long, drawn-out process. You can make your own soda with just a few minutes
of work, and it’s rewarding to see the curtain pulled back on an everyday drink, as
the following recipe illustrates. Start with an empty two-liter soda bottle. Add water, sugar, yeast, and
flavorings, let it set at room temp for two days to give the yeast a chance to do
its thing, and you’ll have soda. Create a ginger syrup by bringing to a boil and simmering for at least 15
minutes: 1 cup (240g) water ¾ cup (150g) sugar 1 cup (90g) ginger, finely chopped
Strain simple syrup to remove ginger pieces and transfer into a two-liter soda
bottle. Add: 30 oz (900g) water 4 oz (120g) lemon juice ½ teaspoon (1g) yeast
Screw on lid, shake to combine, let rest at room temperature for two days, and
then transfer to fridge and drink. |
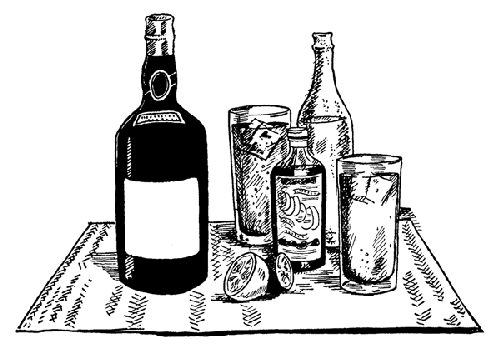
Dark & Stormy Cocktail
|
In a highball filled with ice, pour:
6 oz (180ml) Ginger Lemon
Soda 2 oz (60ml) Dark Rum
Garnish with a slice of lime.
|

Notes For yeast, try using Lalvin’s #1118 yeast (available online
at
http://www.lalvinyeast.com) or look for a local brewing
shop. Baker’s yeast can be used, but it’ll contribute a slightly odd
flavor. Try adding cayenne pepper or other spices to the simple syrup, or
making other flavors, such as mint lime. The method is the same—create a
flavored simple syrup (say, ½ cup mint leaves simmered instead of ginger), and
use lime juice in the place of lemon juice. Like mojitos? In a tall glass filled
with ice, pour 3 oz (90 ml) mint lime soda, 2 oz (60 ml) white rum, and 1 oz (30
ml) lime juice. To be proper, muddle fresh mint leaves with sugar in the glass
before adding the ice. You can skip peeling the ginger, since it will be strained out.
However, the ginger will become tender and sugary—this is how to make candied
ginger!—so slice off the skin if you do want to save the
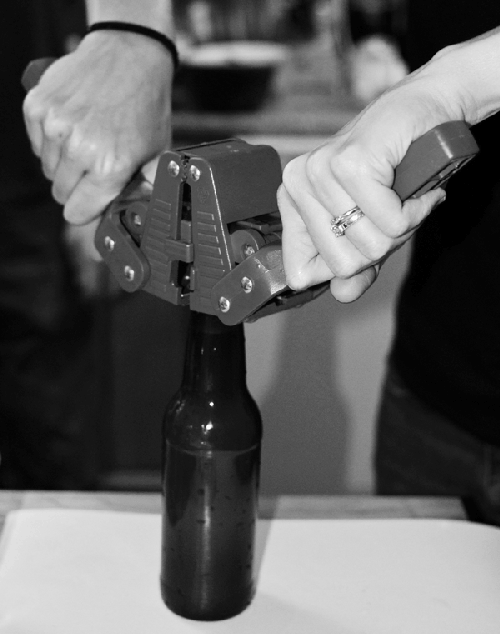
pieces. Want to go all out, DIY-Soda-Company style? “Recycle” some beer
bottles and cap them yourself with a handy-dandy beer bottle capper, available
for about $20 online. 
|
You’ve just added starter yeast to bread dough or a
liquid such as wort (beer liquid before it’s beer). What happens next?
Respiration. A cell gains and stores
energy. No oxygen? No respiration. During this stage, the yeast builds up energy
so it can reproduce.
Reproduction. The yeast cell multiplies via
budding or direct division (fission) in the presence of oxygen. Acidic compounds
get oxidized during this stage, with the quantity and rate depending upon the
strain of yeast, resulting in different pH levels in the food.
Fermentation. Once the yeast has utilized
all the available oxygen, it switches to the anaerobic process of fermentation.
The cell’s mitochondria convert sugar to alcohol and generate
CO2 (“yeast farts”!) and other compounds in the process.
You can control the level of carbonation and alcohol in beverages by controlling
the amount of sugar.
Sedimentation. Once the yeast is out of
options for generating energy—no more oxygen and no more sugar—the cell shuts
down, switching to a dormant mode in the hope that more oxygen and food will come
along some day. In brewing, it conveniently clumps together (called
flocculation) and settles to the bottom, where it’ll stay
if you’re careful when pouring out the liquid. Commercial beverages filter out and
remove this sedimentation before bottling, but if you make your own brew, don’t be
surprised at the thick layer of gunk that forms.
While each yeast cell goes through these stages, different cells can be in
different stages at the same time. That is, some cells can be reproducing while others
are respiring or fermenting.