3.4. Making gels: Sodium alginate
The gels covered so far are all
homogenous, in the sense that they are incorporated into the
entire liquid and then set with heat. Alginate, however, sets via a chemical reaction
with calcium, not heat, which allows for an interesting application: setting just part
of the liquid by localized exposure to calcium.
This is done by adding sodium alginate to one liquid and calcium to a second liquid
and then exposing the two liquids to each other. The sodium alginate dissolves in water,
freeing up the alginate, which sets in the presence of calcium ions, which will only
occur where the two liquids touch. Imagine a large drop of sodium alginate–filled
liquid: the outside of the drop sets once it has a chance to gel with the assistance of
the calcium ions, while the center of the drop remains liquid. It’s from this
application that the technique called spherification is
derived.
Instructions for use. Add 1.0% to 1.5% sodium alginate into your liquid (use water for your first
attempt). Let the liquid rest for two hours or so to hydrate fully. It will be
lumpy at first; don’t stir or agitate the liquid, as doing so will trap air
bubbles in the mixture.
It’s probably easiest to add the sodium alginate a day in advance and let it
hydrate in the fridge overnight.
In a separate water bath, dissolve calcium chloride to create a 0.67% solution
(about 1g calcium chloride to 150g water).
Carefully drip or spoon some of your sodium alginate liquid into the calcium
bath and let it rest for 30 seconds or so. (You can use a large “syringe” dripper or
turkey baster to create uniformly sized drops.) If your shape floats, use a fork or
spoon to flip it over, so that all sides of it are exposed to the calcium bath.
Remove from bath, dip into another bowl of just water to rinse off any remaining
calcium, and play.
Sodium alginate gels firm up over the span of a few hours, so you’ll need to
make these near when you intend to serve them.
If your sodium alginate sets without exposure to the calcium bath, use filtered
or distilled water. Hard water is high in calcium, which can trigger the gelling
reaction.
Uses. The food industry uses alginate as a thickener and emulsifier. Since it
readily absorbs water, it easily thickens fillings and drinks and is used to
stabilize ice creams. It’s also used in manufacturing assembled foods; for
example, some pimento-stuffed olives are actually stuffed with a pimento paste
that contains sodium alginate. The olives are pitted, injected with the paste, and
then set in a bath with calcium ions to gel the paste.
Origin and chemistry. Derived from the cell walls of brown algae, which are made of cellulose and
algin. Alginates are block copolymers composed of repeating units of
mannopyranosyluronic and gulopyranosyluronic acids. Based on the sequence of the
two acids, different regions of an alginate molecule can take on one of three
shapes: ribbon-line, buckled shape, and irregular coils. Of the three shapes, the
buckled shape regions can bind together via any divalent cation. (A cation is just
an ion that’s positively charged, i.e., missing electrons.
Divalent simply means having a valence of two, so a
divalent cation is any ion or molecule that is missing two
electrons.)
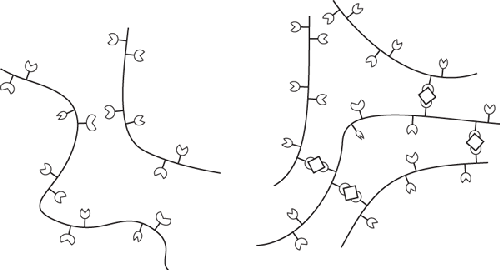
Alginate does not normally bind together (left), but with the
assistance of calcium ions is able to form a 3D mesh (right).
This is really just a
quick experiment to illustrate how to work with sodium alginate. 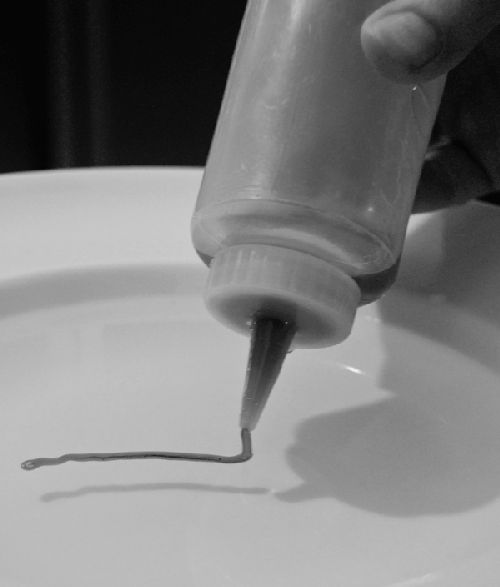
Create a 1% solution of sodium alginate and water. Add food coloring so that you
can see the mixture as you work with it. Using a squeeze bottle, pipe out a strand
into a bowl containing a 0.67% solution of calcium chloride in water. Try making drops and other shapes as well. One food trend that’s still making the
rounds is mini “caviar.” The small drops of set sodium alginate liquids have a similar
texture and feel as caviar but with the flavor of whatever liquid you use. Once you’ve played with this using water, try using other liquids. Jolt Cola?
Cherry juice? Keep in mind that liquids that are high in calcium or very acidic will
cause the alginate solution to gel up on its own. 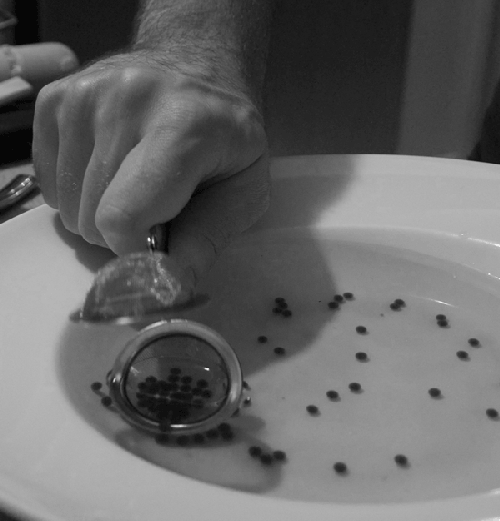
|
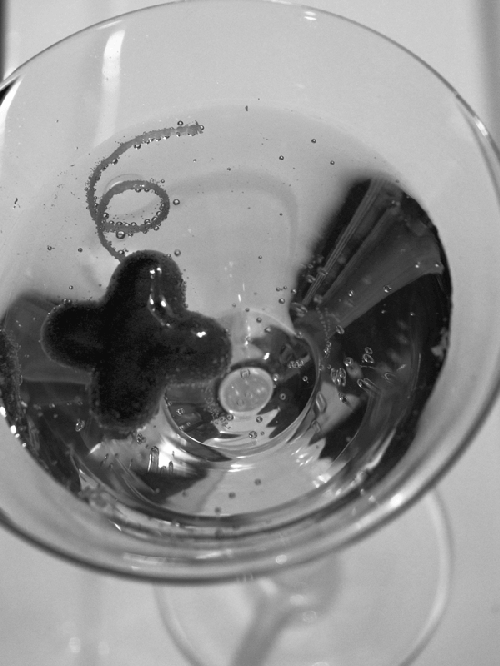
3.4.1. Spherification in shapes
Since sodium alginate sets via a chemical reaction, not a thermal one, you can
freeze a liquid into a mold and then thaw it in a calcium bath to cause it to
partially maintain its shape. The final shape won’t retain the crisp edges of the
original frozen shape—it’ll swell and bloat out slightly—but you’ll still get a
distinctive shape.
Note:
Note that straight-up lime juice won’t work, because the alginate will
precipitate out in the presence of strong acids. If you’re willing to experiment
further, try using sodium citrate to adjust the pH.
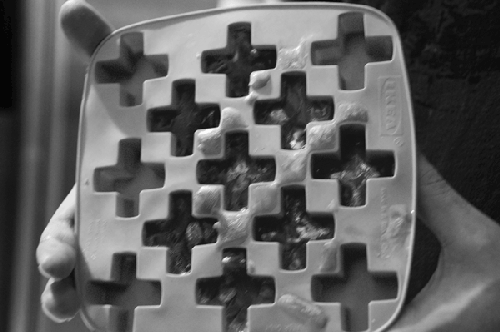
Try freezing the liquid in a mold before setting the sodium alginate
to get more complicated shapes.
3.4.2. Mozzarella spheres
What happens if you want to use sodium alginate in a food that already contains
calcium? Depending upon the amount of calcium in the food, adding the sodium alginate
straight to it would cause the liquid to set, giving you something similar to a
brittle gel.
Swapping the chemicals—adding the calcium chloride to the food and setting it in a
sodium alginate bath—doesn’t work; calcium chloride is nasty-tasting. Luckily, it’s
the calcium that’s needed for the gelling reaction, not the offensive-tasting
chloride, so any compound that’s food-safe and able to donate calcium ions will work;
calcium lactate happens to fit the bill. This technique is called reverse
spherification.
To create mozzarella spheres, mix 2 parts mozzarella cheese with 1 part heavy
cream under low heat. Add around 1.0% of calcium lactate to this liquid and then set
it in a water/sodium alginate solution of 0.5% to 0.67% concentration.
Flour (roux method)
Create a simple roux by melting 2 tablespoons (25g) of butter in a saucepan and
then adding 2 tablespoons (17g) of flour. Stir while cooking over low heat until the
roux sets and begins to turn light brown, about two to three minutes.
Add 1 to 1½ cups broth or stock; whisk to combine. Simmer over low heat for
several minutes, until the gravy has reached your desired thickness. If the gravy
remains too thin, add more flour. (To prevent clumping, create a slurry by mixing
flour with cold water, and add that.) If the gravy becomes too thick, add more
liquid.
Cornstarch
Create a cornstarch paste by mixing 2 tablespoons (16g) cornstarch with ¼ cup
(60g) cold water.
In a saucepan, heat up 1 to 1 ½ cups broth or stock. Add the cornstarch and
simmer for 8 to 10 minutes to cook the cornstarch. If the gravy remains too thin,
add more cornstarch paste. If the gravy becomes too thick, add more liquid.
Notes
You can use the drippings from roasted meats, such as turkey or
chicken, to bring more flavor to the gravy. If using flour, substitute the fat
in the drippings for the butter. If you’re searing a piece of meat, use the
same pan for making the gravy, deglazing it with a few tablespoons of wine,
vermouth, Madeira, or port to loosen up the fond that
will have formed on the surface of the pan.
Try sautéing some mushrooms and adding them into the gravy as
well. Or, if you’re cooking a turkey, slow-cook the turkey neck a day in
advance and pull off the meat and add it into the gravy as
well.