Brined pork chops are a good
example of wet brining. This is also one of those dishes that’s both tasty and
easy.
In a container, mix 2 tablespoons (60g) salt with 4 cups (1 liter) of cold water.
Stir to dissolve salt. Place 2 to 4 boneless pork chops in the brine and store them in
the fridge for an hour. After pork chops have brined, remove from water and pat dry
with paper towels. Lay out the pork chops on a clean plate to allow them to come to
room temperature.
Create a filling by mixing together in a bowl:
¼ cup (40g) poblano pepper, roasted and
then diced, about 1 pepper (see notes)
¼ cup (40g) cheddar cheese or Monterey Jack cheese,
cut into small cubes
½ teaspoon (3g) salt
½ teaspoon (1g) ground black pepper
Prepare the pork chops for stuffing: using a small paring knife, make a small
incision in the side of the pork chop, then push the blade into the center of the pork
chop. Create a center cavity, sweeping the blade inside the pork chop, while keeping
the “mouth” of the cavity—where you pushed the knife into the meat—as small as
possible.

Stuff about a tablespoon of the filling into each pork chop. Rub the outside of
the pork chops with oil and season with a pinch of salt.
Note:
You’ll have leftover filling. It’s better to make too much than risk not having
enough. Save the extra stuffing for scrambled eggs.
Heat a cast iron pan over medium heat until it is hot (about 400°F / 200°C, the
point at which water dropped on the surface sizzles and steams). Place the pork chops
in the pan, searing each side until the outside is medium brown, about five to seven
minutes per side. Check the internal temperature, cooking until your thermometer
registers 145°F / 62.8°C. Then remove the pork chops from the pan and let them rest on
a cutting board for five minutes.
Note:
You can pull the pork chops from the pan before they reach temperature and let
the carryover bring them up to 145°F / 62.8°C, but make sure they do get up to this
temperature. You should also verify that your thermometer is calibrated correctly
and that you properly probe the coldest part of the meat.
To serve, slice the pork chops in half to reveal the center. Serve on top of
rosemary mashed potatoes .
Notes
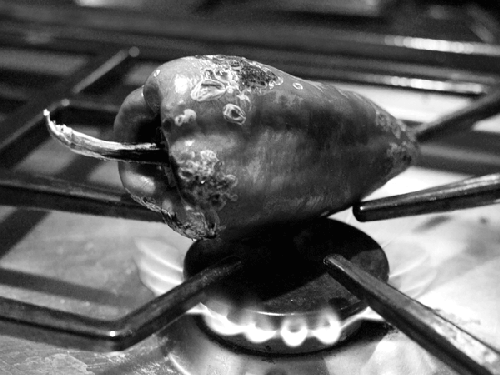
How do you roast a poblano pepper? If you have a gas stovetop, you
can place the pepper directly on top of the burner, using a pair of tongs to
rotate it as the skin burns off (expect the skin to char and turn black; this is
what you’re going for). If you don’t have a gas stovetop, place the pepper under
a broiler (gas or electric) set to high, rotating it as necessary. Once the skin
is burnt on most sides of the pepper, remove from the heat and let it rest on a
cutting board until it’s cool enough to handle. Using a cloth or paper towel,
wipe off the burnt skin and discard. Dice the pepper (discarding the seeds,
ribbing, and top) and place into a bowl.

Try other fillings, such as a mixture of sage, dried fruits
(cranberries, cherries, apricots), and nuts (pecans, walnuts); or pesto
sauce.
145°F / 62.8°C? I thought pork had to be cooked to 165°F /
73.9°C! Good question; glad you asked. Trichinosis—a parasitic infection from
roundworm—has historically been a concern in pork, but this is no longer the case in
the United States. The U.S. Code of Federal Regulations requires commercial processors
that cook pork to heat it to 140°F / 60°C—well below the well-done temperature of
165°F / 73.9°C—and hold it at that temperature for at least one minute. To be safe, give yourself at least a 5°F
/ 2°C error window. When cooking pork chops, leave the temperature probe in after the
chop reaches temperature and check that the temperature remains at or
above 145°F / 62.8°C for at least one minute. If you see the temperature
drop down, transfer the chops back to the pan. The pan itself—even off-heat—should
have enough residual heat to keep them at 145°F / 62.8°C. If you’re curious about the history of trichinosis, see the USDA’s Parasite
Biology and Epidemiology Lab fact sheet at http://www.aphis.usda.gov/vs/trichinae/docs/fact_sheet.htm. A
century ago, ~1.4% of pork was infected; in 1996, of 221,123 tested animals in the
United States, 0 were infected. 
|
Salt can also be used as a “protective outer
layer” on food during cooking. By packing foods such as fish, meats, or potatoes in
a mound of salt, you ensure that the outer surface of the cooked food doesn’t reach
the same surface temperatures as it would if uncovered, leading to a less extreme
gradient of doneness . Traditionally, the salt is mixed with egg white or water to make a thick
paste that will hold its shape and can be packed around something like a
fish.
Note: When salt roasting, leave the fish skin on. It’ll prevent the fish from getting
too salty.
You don’t need to bury the fish too deeply. Go for about 1/2″ / 1 cm of
salt on all sides—enough to take the brunt of the surface temperature but not so
much that the center of the fish takes too long to actually reach
temperature. Try this with a whole fish, something medium to large (2 to 5 lbs / 1 to 2 kilos),
such as a striped bass or rockfish (check http://seafoodwatch.com for suggestions). Rinse the fish
thoroughly, and add some herbs (rosemary, bay leaf, etc.) and lemon wedges in the
center. Line a baking pan with parchment paper (this’ll make cleanup easier), and add
a thin layer of salt. Place the fish on top of the salt, and then pack the rest of the
salt around the sides and top of the fish. Bake the fish in an oven set to 400–450°F / 200–230°C, using a probe thermometer
set to beep when the internal temperature reaches 125°F / 52°C. Remove from oven and
let rest 5 to 10 minutes (during which carryover will bring the temp up to 130°F /
54°C). Crack open the layer of salt and serve. Notes Don’t have a probe thermometer? The Canadian Department of Marine
Fisheries recommends measuring the thickest part of the fish and cooking for 10
minutes per inch. (Add ~10 minutes for the 1″ / 2.5 cm of salt around the
fish.) Try this with other foods, such as pork loin (add spices—black
pepper, cinnamon, cayenne pepper—to the salt mixture) or even entire standing
rib roasts. Sugar can also work as a “packing material,” provided that the oven
temperature remains sufficiently low. Salt melts at 1474°F / 801°C, well above
oven temperature; sugar melts at 367°F / 186°C. Given this, you should be able
to do the equivalent of salt roasting with sugar at temperatures below 367°F /
186°C (try around 325°F / 163°C). However, it takes less water to dissolve the
same amount of sugar, so moist items such as fruits will end up giving off too
much water for this to work. When I tried “sugar roasting” an apple at 340°F /
170°C, the moisture in the apple was enough to allow the sugar to dissolve into
a syrup. It was still delicious, though.
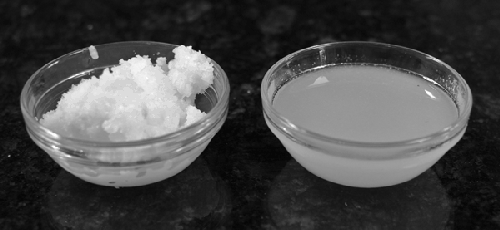
100 grams of salt (left) and 100 grams of sugar (right), each
with 30 grams of water.

|